It starts as soon as Thanksgiving dinner is cleared from the table, “How long until Christmas?” the same question asked multiple times a day from 3 different children.
This year, since I’m feeling especially crafty, I thought I’d hand make a Christmas Countdown Tree. Now, you know this was one of those projects that you see something on Pinterest and think, “I can totally do that!”, but this one was different because I TOTALLY DID IT! (Here’s the original pin https://www.pinterest.com/pin/51087777001562787/ )
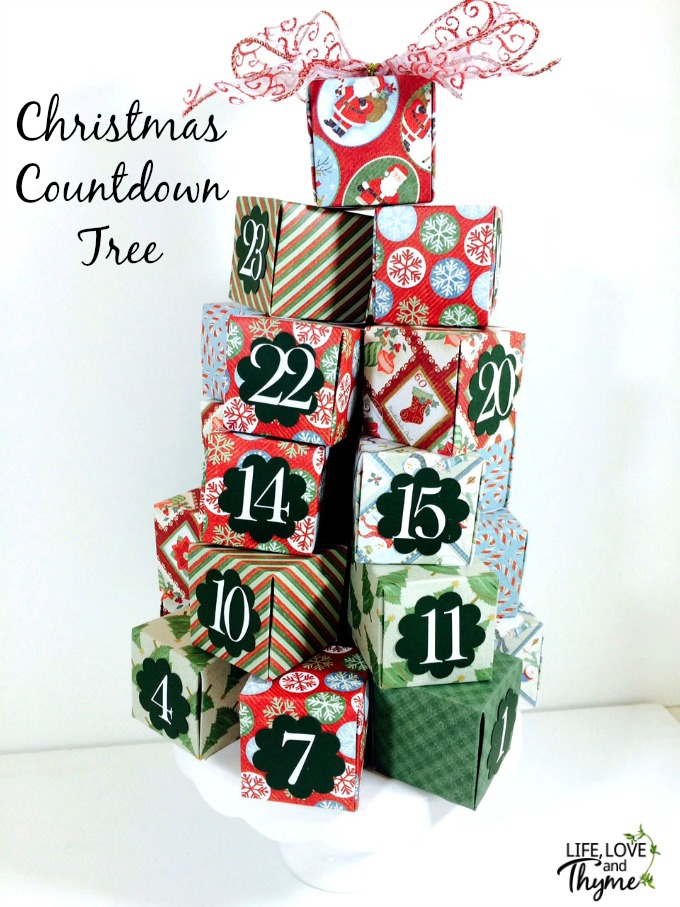
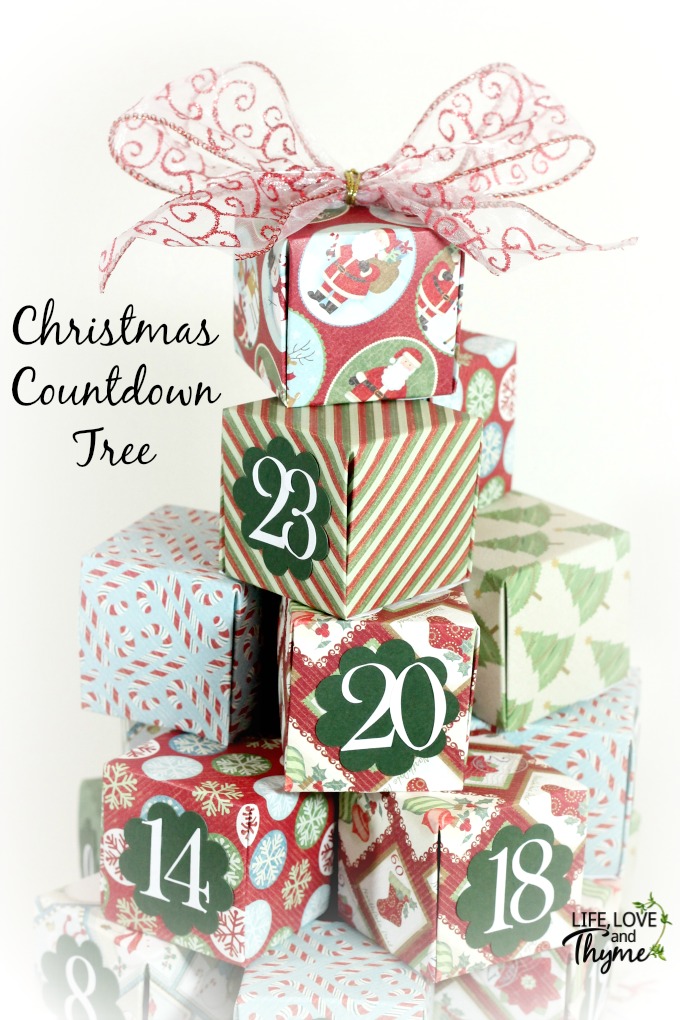
Christmas Countdown Tree
Now I will admit…this tree is a fairly simple project, but it is a bit time consuming. I’ve got a few tips to help you make it a little faster than I did though…so be sure to read the entire post!
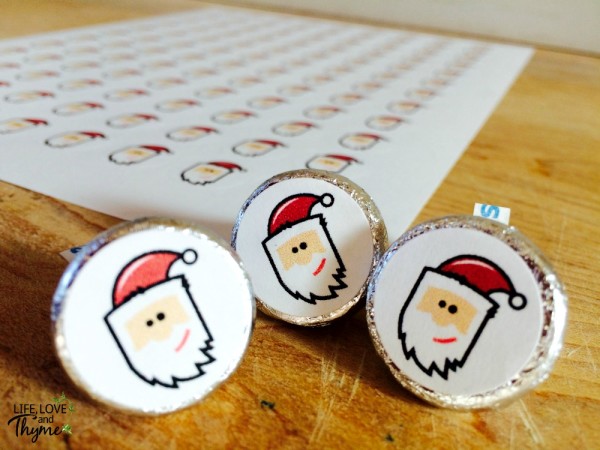
The first thing I did was to print out some Hershey kiss labels (you can get them in my Etsy store) and put together enough for each of my kids to have 1 each day for 24 days. (Each sheet has 108 stickers so most people will be good with one sheet.)

Next I cut Christmas themed scrapbook paper into 6″ x 6″ pieces. If you use 12″ x 12″ paper then you will need 7 different kinds of paper (you will get 4 boxes out of each piece = 6 pieces of paper and then one more “special” paper for the top box. I use a Fiskars SureCut Paper Trimmer to cut the pieces.
You will also need this cool little contraption that will make making 25 little boxes a snap – the We R Memory Keepers Gift Box Punch Board. This makes this project go very quick.
You just line your paper up with the S line. Then you use the bone folder (knife looking thing) and make score marks on the vertical and horizontal lines coming out of the punch button. Also score the little diagonal line from the S to the right of the punch and then punch also.
Turn the paper 90 degrees and do the exact same thing. Do this for all four sides then flip the paper over, line it up on the S and punch. Do that on all four sides. Then place each corner of the box into the back side of the punch to make the closure slits in them.
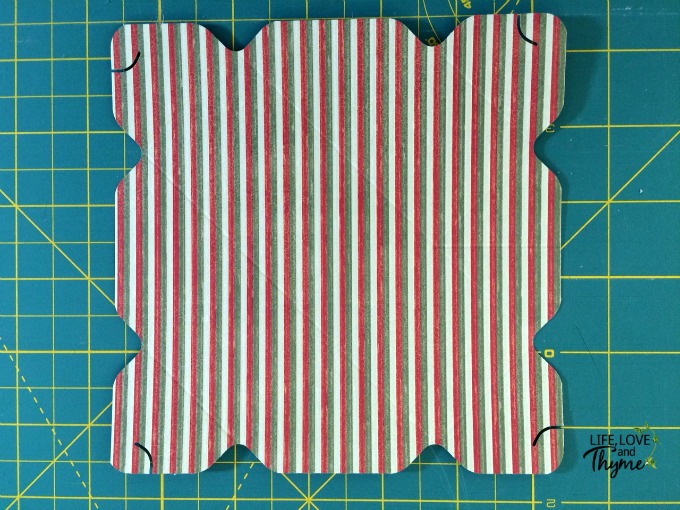
Your paper should look like the one above.
Next you want to fold the paper on all the score lines and place your candy (1 piece for each kid) in the middle.
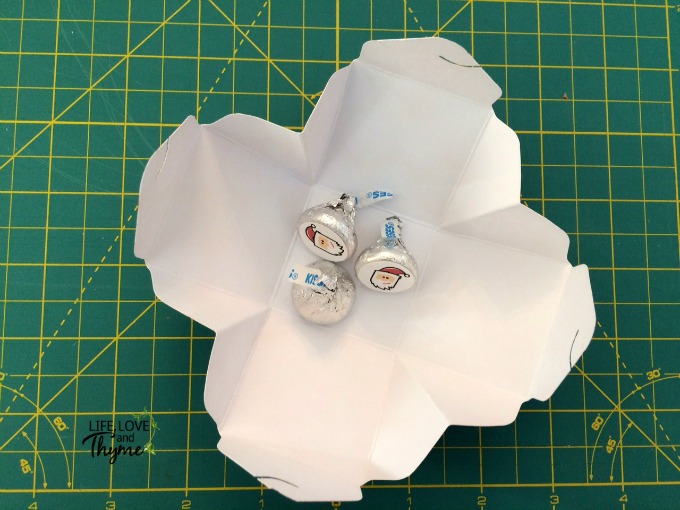
Next you just close the box by hooking the opposite side slits together. This is probably the hardest part of the entire project. Don’t worry if you rip them. Just tape them and put that part on the bottom.
Now do this 24 more times…don’t worry…I’ll wait.
If you have a Silhouette Cameo Electric Cutting Machine – click this link to get free downloads of the numbers and backgrounds I used to make the numbers.
If you don’t have a Silhouette, you can use a 1.5″ circle paper punch (I used green cardstock but you can use any color) to create the background and then maybe some Christmas countdown stickers.
I used my Bowdabra to create a bow on top, but you can always just use a gift box bow! Remember that box #25 doesn’t get a number, but does get the bow.
I put the smaller numbers on the bottom so I wouldn’t have to restack the tree daily. (It’s a count down right so you would start with #24 on December 1st and then go to #1 on December 24th.)
I stacked my tree like this: the bottom layer had 7 boxes; then 6 boxes, then 5 boxes, then 4 boxes, then 2 boxes and then box #25 on top.
I hope your family enjoys this Christmas Countdown Tree as much as I enjoyed making it!
So find a good show on Netflix and get to paper crafting!