


Everyone comments about how much they LOVE Maddi’s bows. And although it was a struggle that first month, she loves them now (check out this post where she’s standing in front of a wall of bows)!
Recently I got to thinking “I can do this!” They look fairly simply made and I know there are tools out there (not to mention YouTube) to help me figure this out!
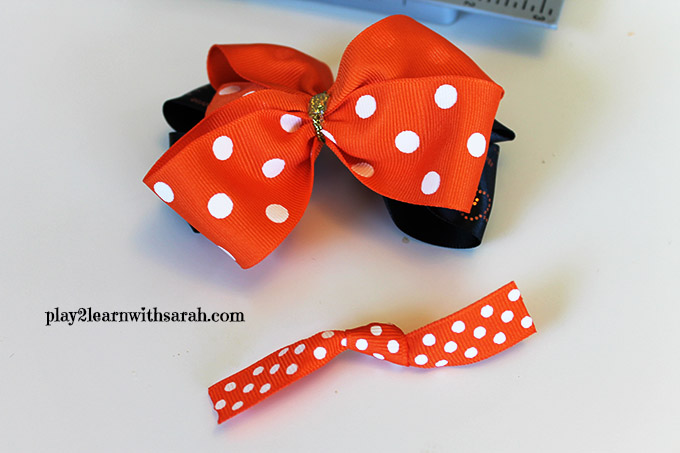
So here’s my very first hair bow tutorial using the mini Bowdabra!

Hair Bow Tutorial
Tools You Will Need
Ruler
1-2 kinds of 1.5″ ribbon cut to 22″ each
1 kind of 5/8″ ribbon cut to 6″
ruler
lighter or clear nail polish
hot glue gun or glue dots
mini Bowdabra hair bow making kit
18″ Bowdabra wire (comes in the kit)
Step 1
Gather all your materials, cut your ribbon to the right length and sear the edges so they don’t fray. Fold your Bowdabra wire in half and place in lengthwise. Then fold your main ribbon in half and find the center. Then pinch it so it folds up, down, up, down… and place into the Bowdabra.

Step 2
Take one side and fold over so that it folds at the 2″ mark on your Bowdabra. Fold it up, down, up, down…and place into the Bowdabra. Then do the same with the other side.

Step 3
Do the same with the 2 tails and then use the Bowdabra wand to squish it down and hold it in place. (You could stop here and have a VERY cute bow!)

Step 4
Repeat the process with the second ribbon. Be sure to put the wand back in to keep everything in place.

Step 5
Remove the wand and pull up both sides of the wire. Slip the loose ends of the wire through the looped end and pull straight up. Carefully remove the bow completely. Try to straighten the bow to where you want everything. Flip the bow over and tie a knot in the back. Cut the wires so there’s nothing hanging out.

Step 6
Tie the 6″ ribbon into a knot in the middle. Place the knot on the front to make sure you have it where you want it. Place a glue dot or hot glue dot on the wire under the knot and hold it down.
Step 7
Grab the hair clip and put some hot glue on it and place it on the middle of the back of the bow and hold. Then take one side of the middle ribbon and wrap it over the bottom of the clip and glue it down. Repeat with the other side….cutting any extra if needed (you may also want to sear the edges again if you cut it…just be careful not to catch everything on fire!).

Step 8
Fluff it up and you’re ready to go. I apologize this picture isn’t more clear, but it’s hard to get her to stand still some times.

The Bowdabra made it SUPER easy to create this bow. There are TONS of videos on YouTube about making all different kinds of bows. I’ve become addicted to watching them! Also check out the Bowdabra Blog for tons more ideas.
Have you tried to make your own bows?

Disclosure: I purchased all of these products on my own…Bowdabra has nothing to do with this post. All opinions are 100% my own. This site is an Amazon affiliate site and this post contain affiliate links.