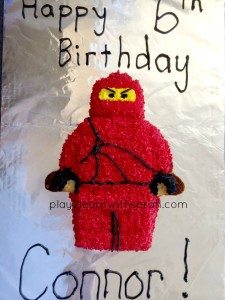
Last year, Connor asked for a Lego Horse cake for his birthday…and I did it. This year, he’s still into Legos, but now he wanted a Lego Ninjago cake.
I was a little worried that I couldn’t really pull this one off. I didn’t have the right pan or any directions on how to do it, but I had taken all the Wilton courses and had made a few of those character cakes before. So I just went with my gut and jumped in.
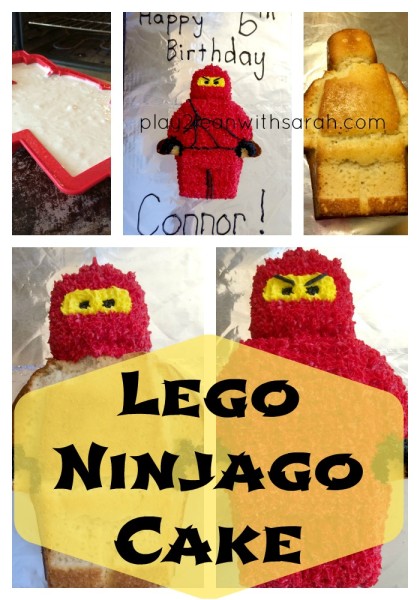 How to Make a Lego Ninjago Cake
Pre-Baking: Assemble all of the necessary materials: Lego Minifigure Cake Mold, red, black and yellow icing, Wilton icing tips #3, 14 and 16, cake board, cake leveler and of course cake mix and ingredients.
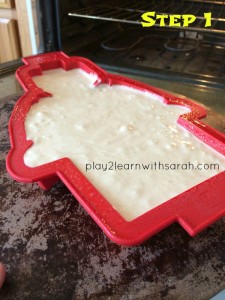
Step 1: Prepare the mix according to the box or your recipe. You can spray the mold with cooking spray. I’m not sure if it helped me or not since parts still stuck to the pan.
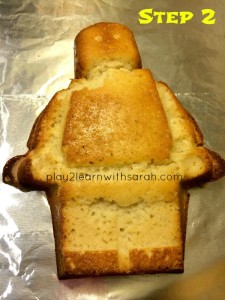
Step 2: Wrap one of the cake boards in aluminum foil. Take the cake out and let cool for 10 minutes. Then transfer the cake to a rack to cool completely outside of the mold. Once it’s cooled, place it on the cake board, face down. Use the cake leveler to make the bottom part level so he sits flat on the board. Then flip over to be face up.
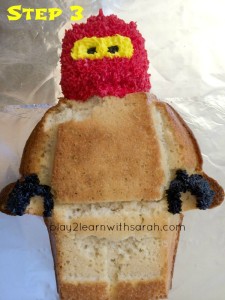
Step 3: Use the black icing and tip #3 to do his eyes. Then switch to tip #16 to make little stars on his hands in black. Then use tip #14 to make little stars for the yellow mask around his eyes. Finally use the tip #16 on the red icing to make little stars for his hood.
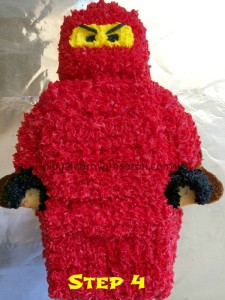
Step 4: Continue to make little red stars all over his body using tip #16. Then go back to tip #3 with the black icing to make his eye brows and add any suit decorations.
Step 5: Use tip #3 to write on the cake board.
Check out the cool Lego Ninjago T-Shirts I had made as party gifts!
